Education > Beginner Guide
Introduction
What is Orienteering?
Orienteering is a timed event during which you use a sport orienteering map to navigate to a series of checkpoints around a pre-designed course.
Where to Orienteer?
The best way to learn about orienteering is to try orienteering. Georgia Orienteering Club (GAOC) recommends two choices for your first orienteering experience: a local event administered by GAOC or a permanent course installed by GAOC at a local park.
Local Events
When trying orienteering for the first time, it is generally better to choose a local event administered by GAOC and listed on the GAOC Events Schedule. Local events require preregistration and prepayment.
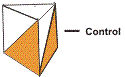
Before heading to the event, find directions to the event's location on our list of venues or just look for the park name in your GPS app. As you approach the venue, start looking for our small orange and white direction signs. The signs are about 12"x12" and look like an orienteering control. They'll point you to where we are in the park.
GAOC generally offers beginner instruction at every local event. You must register for beginner instruction when you register for the event. At the beginner instruction, a GAOC instructor will describe the event procedures, rules of orienteering, and basic map reading techniques.
Local events offer a variety of courses based on skill level and distance. As a Beginner, you'll want to try the White course first, but if you're happy with your performance, you can go out on the next level course afterwards.
Permanent Orienteering Courses
GAOC maintains permanent orienteering courses at several of our most popular orienteering locations. Permanent orienteering courses offer a practical alternative to those who want to practice orienteering on their own schedule.
Permanent course maps are available for a fee (generally around $10) from the Park office. We recommend you call the park before going to make sure they have a supply of permanent orienteering course maps available. Check their websites for additional park information.
Permanent courses are set using small permanent controls mounted on posts. When you purchase a permanent orienteering course map from the Park office, you'll receive a map pre-printed with the courses, control descriptions, and an instruction sheet. Then you're on your own to either enjoy the courses set on the map or make up your own courses by deciding which controls to visit in which order.
Equipment
For your first event, wear long pants and comfortable walking or running shoes. You might also want to bring water, a snack, and some dry clothes. There is generally no water on the course, so you have to decide whether and how to carry water.
Compass
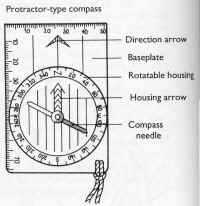
You don't need a compass for the beginner course. When you decide to get a compass, start with a baseplate compass. You don't need to spend a lot of money, as they are readily available at Walmart or on Amazon. Try to get one with a transparent base, a centimeter scale, a rotating bezel (housing) and a lanyard. As you advance in the sport, you may decide you need a thumb compass. Orienteering thumb compasses are available from various orienteering vendors listed on the Orienteering USA (OUSA) vendor page. (You can also look at the OUSA vendor page to get an idea of specialized orienteering clothing that is available, but not necessary.)
Whistle
A small whistle comes in handy if you get injured in the woods. Simply blow three times to alert others around you. Do not blow your whistle if you are merely lost; only blow it if you are injured or extremely lost and require rescue.
Before You Go
Preregistration and prepayment is required to participate in GAOC local events. Preregistration for each event usually opens on the Monday before the event and closes at 5:00am on the day of the event. The registration link can be found on our home page.
Fees
The base registration fee starts at $7 for members and $10 for non-members. If you're going out as a small group of up to 5 people as one entry, the base fee for the entire group is $12 for members and $15 for non-members. (Small groups going out on the same course as one entry should register as a group on one registration form, and should enter each person's name in the area provided on the form. Each group member will receive a map.) Rental timing sticks cost an additional $3.
In addition to the map fee, the park may charge a usage fee. GAOC does not collect these usage fees. The park generally has self-serve boxes set up in the parking lots and the usage fees are usually $10/vehicle.
Here are a few examples:
| Item | Individual | Small Group |
|---|---|---|
| Full Member | $7 | $12 |
| Associate or Non-member | $10 | $15 |
| E-stick rental | $3 | $3 |
| Second course | $3 | $8 |
| State Park parking fee | $10 per car | $10 per car |
Start Time
Starts typically run from 9 a.m. until noon with a 3-hour time limit. You select your start time when you preregister. All participants must be off all courses by 2 p.m.Personal Information
Fill out all of the fields on the preregistration form completely and accurately. You will be asked for emergency contact information; a separate emergency contact phone number is critical in case you are severely injured or lost and we cannot contact you on your phone number.
Another important piece of information we need from you on the preregistration form is your car description and tag number. Why? We have to make sure that everyone who went out on a course came back in from the course. So if you have not checked in with us after 3 hours on the course, we can search the parking lot for your car to help us decide whether you are still in the woods.
If you're going out in a group, add everyone's name to the group member section, and make sure that everyone in the group has signed an annual waiver.
Course
If this is your first time orienteering, even if you have prior map reading experience, we recommend that you do the White level course. This course is designed for beginners, is set along well-defined trails or linear features, and is typically 2.5 km or less.
Here is a short description of the courses we typically offer at local events:
| Course | Optimum Winning Time | Approximate length |
|---|---|---|
| White (beginner) | 30 minutes | 2.5 km or less |
| Yellow (novice) | 40 minutes | 2.5 km - 4 km |
| Orange (intermediate) | 50 minutes | 3.5 - 5 km |
| Silver (expert) | 40 minutes | 2.5 - 4 km |
| Brown (expert) | 50 minutes | 3.5 - 5 km |
| Green (expert) | 50 minutes | 5 - 6 km |
| Red (expert) | 60 minutes | 6 - 8 km |
Signed Waiver
Everyone who participates in an event must have a signed waiver on file. Waivers are to be signed online using the GAOC membership form and are valid for one year after signing. (Associate memberships, the option near the bottom of the membership form, are free.) Please read the waiver -- we're obligated to let you know what the risks are associated with orienteering -- then sign it. If you're less than 18 years old, you'll need an adult to sign for you.Orienteering Basics
The goal of orienteering is to find all of the check points -- called controls -- in numerical order as quickly as possible. Each control location has a visually distinctive orange and white marker and an electronic punch box with a control number. The control number is used to verify that you are where you think you are.
In order to orienteer, you'll need three things: orienteering map, control description sheet (usually on the map), and electronic finger stick (not required for permanent courses).
Orienteering Map
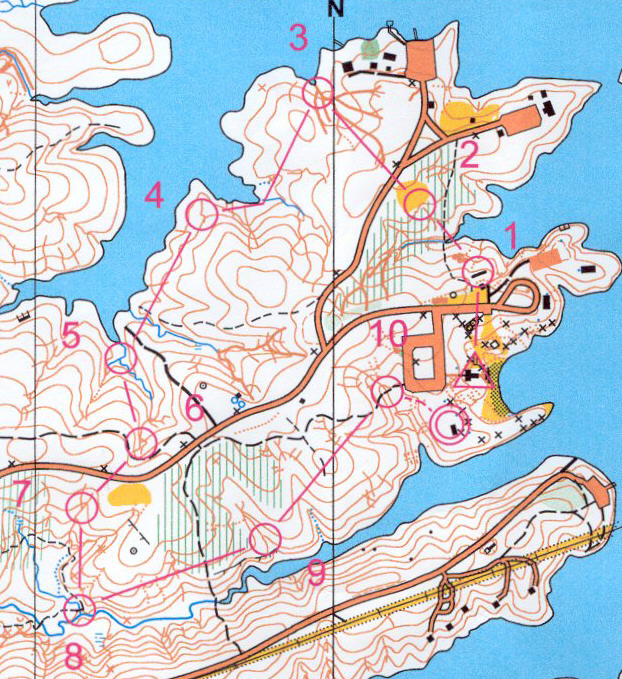
Orienteering maps are detailed topographical maps made by our club mappers for our events. Before you start, we'll give you a clean fresh map with a course printed on it.
[click image to enlarge]
Control Description Sheet
Control descriptions provide details about where your check points -- controls -- are located. We use the international standard symbol set for control descriptions, but we always write out the symbol descriptions for White (beginner) and Yellow (advanced beginner) courses. Before you move up to the Orange (intermediate) course, you will need to be able get by with just the symbols.
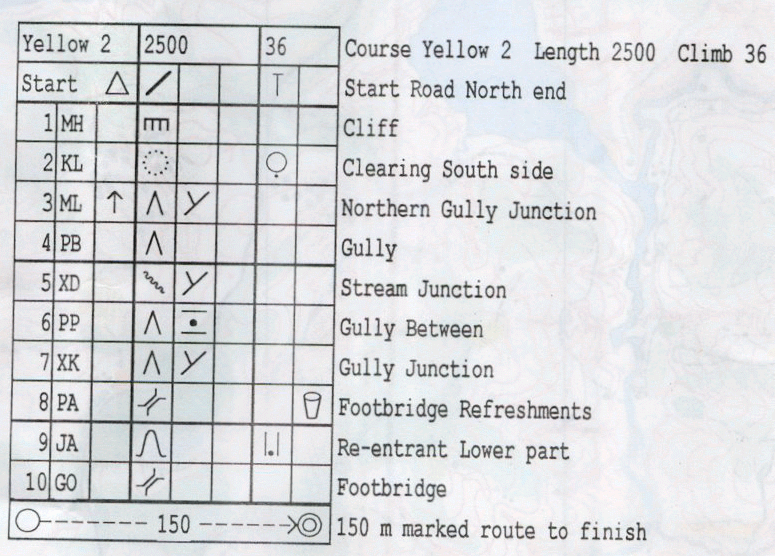
[click image to enlarge]
Electronic Finger Stick
We use electronic finger sticks to verify that you've visited the correct control locations. You can either purchase an electronic finger stick or rent one when you preregister for the event. If you rent an electronic finger stick, you will receive the rental stick just before you start your course and will need to return it when you finish.
Electronic Punching Instructions
Electronic punching is used to record that you have been to the various control locations on your orienteering course. For electronic punching, you carry a plastic SPORTident card, (called a finger stick because it has an elastic band which enables you to wear it on your finger). The finger stick contains a microchip which records the times you "punch in" at each control. If you don't own a finger stick, you can rent one from the club. Each finger stick has a unique number which will be assigned to your name when you preregister. Finger sticks are expensive, so handle and store them with care.
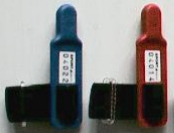
Control boxes write data to your finger stick. Several versions of control boxes exist; some common versions are shown below. You will find control boxes at the Start, Finish, and each control site. Before starting a course, you must Clear and Check your finger stick. This removes old data from the microchip in your finger stick and prepares it to be used for the day's event. At the Start area, you will find 2 control boxes: one marked "Clear" and one marked "Check". First, insert your finger stick into the hole in the "Clear" box, wait for the control box to flash and beep, then remove your finger stick. Next, put the finger stick into the hole in the "Check" box. If the "Check" box flashes and beeps, your finger stick is cleared and ready to use again. If the "Check" box does not flash and beep, go back to the "Clear" box and re-clear; you might need to leave the finger stick in the "Clear" box longer. If you cannot get a flash and beep from the "Check" box on the second try, report the problem to the start volunteer, so that you can get a new stick that works correctly.
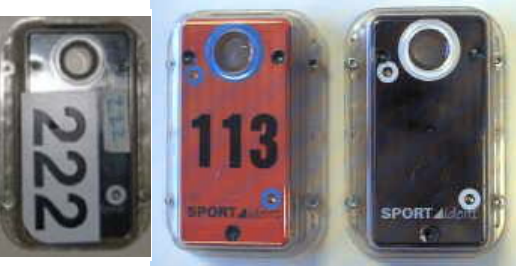
After Clear and Check, you must record your start time on your finger stick. The start time on your finger stick is your official start time, rather than the start time you chose when you preregistered. When the start volunteer indicates it's time for you to start, insert your finger stick into the "Start" control box at the Start line, wait for the beep, then begin your course.
While on your course, when you arrive at a control location, check the codes on the control box and your control description sheet to make sure you are at the correct control. Then, "punch in" by inserting your finger stick into the hole in the control box, and waiting for a flash and/or beep. (The flash and beep indicate that the microchip in your finger stick has recorded the control number and time.) If you punch an incorrect control (mispunch), just go back and punch the correct control, then all controls in order afterward. The Results computer program will ignore incorrect punches as long as all the correct punches are recorded in the correct order.
When you finish your course, you must insert your finger stick into the "Finish" control box, which will be on a stand beside the Finish banner. Next, go to the Download station to have the microchip in your finger stick read into the Results computer. It's very important that you go the the Download station immediately after finishing your course; if you don't download your finger stick, the event crew has no record that you have returned and must search for you after your time limit has passed. Simply put your finger stick in the hole of the Download Box until it beeps, then remove your finger stick. Follow instructions given by the computer operator. You will receive a paper slip showing your elapsed time and your splits at each control. If there is an issue with your results you may discuss the problem with the computer operator.
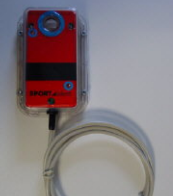
If you are renting the finger stick and will not need to use it again (i.e., during a multi-course or multi-day event), return the finger stick at the Download station once your finger stick has been successfully read into the Results computer.
Do not Clear the finger stick until you are ready to Start a new course. In case of a computer glitch, your finger stick might have to be read again.
Event Procedures
When you arrive at the event, preregistered and prepaid (see Before You Go), there are four parts to our basic event procedures: Beginner Instruction, Starting, Orienteering your course (Rules), and Finishing.
Beginner Instruction
Beginner Instruction is offered at most events and requires preregistration. Instruction usually lasts around 30 minutes. Make sure you check in first because you'll need your map.
Your instructor will review the event procedures, orienteering rules, explain map reading and describe the basic tools and how you'll go about completing your course.
Starting
You must check in at the Start a few minutes before the start time you selected when you registered. The Starter records every name, course, and start time to keep a record of who goes out in the woods. That way if someone gets lost or injured, we can initiate a search and rescue. The starter will tell you when it is time for you to go. You have three hours or until the course closing time, whichever comes sooner, to finish your course.
Orienteering Your Course (Rules)
The object of orienteering is to locate all the checkpoints in order, in the shortest amount of time. The game is easy and fun and best of all there are only a few rules:
- Navigate to each control in sequential order
- Use your finger stick to punch at each control
- Do not move or mess with the controls
- Do not ask for or give assistance, unless someone says they are lost or injured
- Do not follow other competitors
- Return to the finish area and download your electronic finger stick before your designated time limit, regardless of whether you finished the course
Finishing
Punch the Finish control, then proceed to the Download area. Punch again at the Download box to receive a printout of your results. You must punch the finish and the download even if you didn't finish your course. It's the only way we know that you have returned safely.
Check the results monitor or check back on our website later to see how you did. If you found all of the controls with no problems, consider going out on a Yellow course the next time you orienteer. If you had some problems or need some additional help, consider asking some of our members for additional tips.
And now that you've tried orienteering, why not consider joining GAOC? You'll receive a $3 discount at all events and lots of opportunities to improve your skills.
Map Reading
Orienteering maps may seem a bit bewildering to folks who have never used a topographical map. Take heart. In this section, and in the beginner instruction offered at our local events, we talk you through basic map reading skills: Map Colors, Scale, Legend, Contours, Orienteering Course, Orienting the Map, Thumbing, and Using the Compass.
Map Colors
Orienteering maps use five standard colors. Click on the map image below to see a sample.
Blue - water features like lakes, ponds and streams.
Black - man-made objects or rock features like roads, trails, buildings, cliffs, boulders.
White - open woods you could run through
Green - thick vegetation (light green) or fight (dark green) that you might want to avoid
Yellow - open land, semi-open land, where you can look up and see the sky like fields or power lines.
Brown - land features like earth banks or contours
[click image to enlarge]
Scale
Scale refers to the relationship between the size of the map and the actual size of area that is mapped, or relative distance. On a 1:10,000 scale, one of any unit on the map equals 10,000 of the same unit on the ground. Orienteering typically uses "meters" to measure distance.
When you first start orienteering, one way to simplify scale is to use your thumb to measure the distance between two easy to find points, like the start and end of a parking lot. Then walk that distance and count how many times your left foot hits the ground, for example, 1 thumb's width equal 80 paces which equals 120 meters. Your results will differ. This gives you an easy way to "eyeball" the relative distance on your map.
GAOC maps generally use a scale of 1:10,000, but occasionally 1:7,500 or event 1:5,000. Longer advanced courses may use a 1:15,000 scale. The scale is marked on the map along with a ruler that measures 100 meter increments. Blue or black north lines on the map are spaced at 300 meters.
Legend
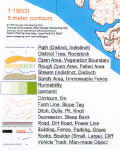
Orienteering maps use the International Orienteering Federation's standard mapping symbols to describe the details on the map. This information can be found in the map's legend, as in the sample to the right.
[click image to enlarge]
Contours
Contour lines are the brown squiggly lines you see on the map. They represent elevation in the landscape. Each line represents points of equal elevation. The contour interval is the difference in elevation between the lines. Common contour intervals include 2.4, 3, and 5 meters. The closer the lines are together, the steeper the landscape.
Orienteering Course
You already learned that the orienteering course is marked with circles, but there are a few more symbols used to mark the orienteering course:
- Triangle marks the location of the start
- Double circle marks the location of the finish
Orienting the Map
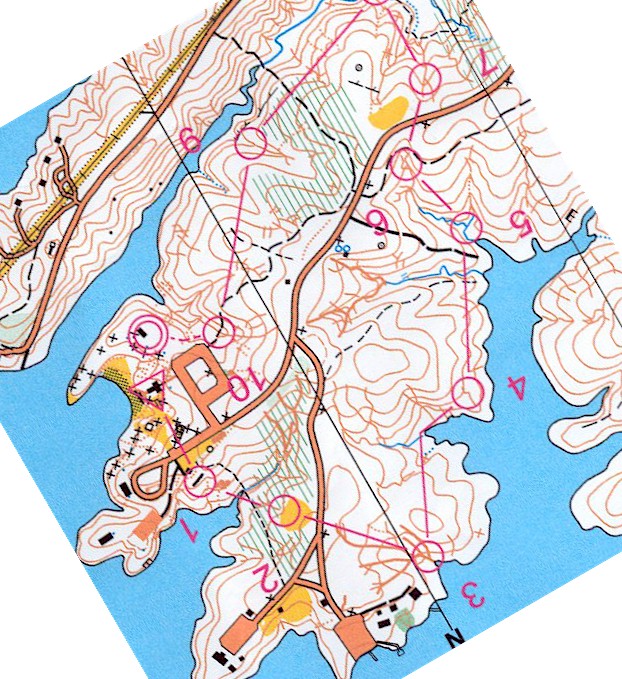
When you use a traditional road map, you keep it turned so that the writing is face up, like a newspaper. But with an orienteering map, you orient the map so that the features on the map are lined up with the same features on the ground. If you have a compass, you can align the North lines or North arrow on your map to the needle on your compass.
For example, if you were at control number 4 and going to control number 5 you would hold your map:
like this
not like this
Thumbing
The best way to keep track of where you've been and where you're going is with your thumb. Just fold your map so most of it is out of the way, except for the control your at and the control your going to. Hold your map so your thumb is on top, at your current location. Then move your thumb to your current location as your travel your route to your next control.
In other words...Say you were going from Control 4 to Control 5 in the map above. Since your a beginner, you'll use large land forms to keep track of where you' are. You'll walk along the shore line until you come to an indistinct trail. Move your thumb there on the map. Next you'll go to a stream, a distinct trail and another stream. As you arrive at each of these points, you'll move your thumb to the points on the map.
Using the Compass
The compass is used primarily to orient your map to North. Otherwise, put your compass away and navigate using the map. You don't need to take headings until you get to the Orange course.